7 Proven Ways to Master Editing Excel Macros in 2026

Before you can tweak, fix, or even understand an Excel macro, you have to find its source code. This code is written in a language called Visual Basic for Applications (VBA), and it lives inside a special window called the Visual Basic Editor (VBE).
Think of the VBE as the engine room for your spreadsheet. It’s where all the automated magic happens. The quickest way in is with a keyboard shortcut: just press Alt + F11.
2 Steps to Find and Open Your Excel Macros
First things first, you need the Developer tab visible on your Excel ribbon. If it’s not there, don't worry—it’s a common first step to overlook. Just right-click any existing tab (like "Home" or "Insert"), choose "Customize the Ribbon," and tick the box next to "Developer" in the list on the right. Once you click OK, you're set.
Spending too much time on Excel?
Elyx AI generates your formulas and automates your tasks in seconds.
Sign up →With the Developer tab enabled, click the "Visual Basic" button on the far left. This opens the VBE in a new window. It can look a bit technical at first, but for now, you only need to know two parts.
Getting Oriented in the Visual Basic Editor in 2 Simple Parts
On the left, you'll see the Project Explorer. This is your file tree, showing every open workbook and all its parts. Your macro code is almost always tucked away in a folder called Modules.
The large empty space on the right is the Code Window. When you find and click on your macro in the Project Explorer, this is where the VBA script will appear, ready for you to edit. If you recorded a macro using Excel's built-in tool, it usually creates a new module (like "Module1," "Module2," etc.) to store it. That's the first place I always look.
This simple flowchart breaks down the path from your spreadsheet to the code itself.
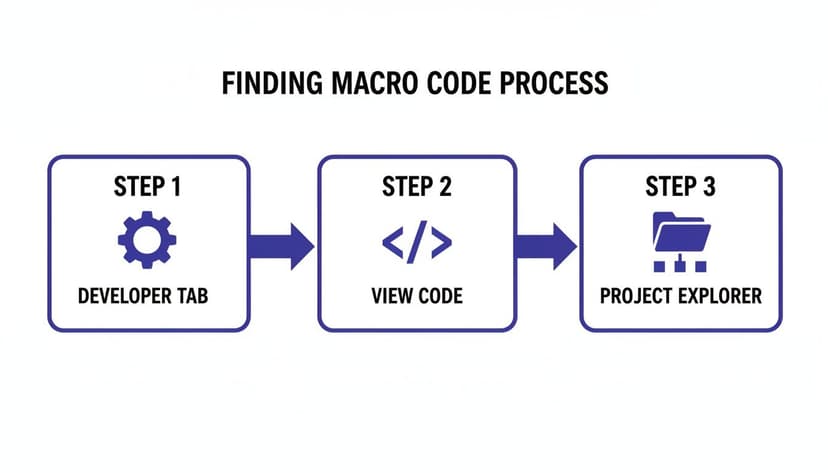
It really is that straightforward: enable the right tab, open the editor, and navigate the project tree to find your code.
For a quick reference, here's a little cheat sheet I use to make sure I'm looking in the right place.
4 Quick Actions to Access Your Macro Code
Use this checklist to quickly locate any macro's VBA code within your Excel workbook.
| Action | What It Does | When to Use It |
|---|---|---|
| Enable the Developer Tab | Makes the macro and VBE tools visible on the ribbon. | The very first time you work with macros, or if the tab is missing. |
| Press Alt + F11 | Instantly opens the Visual Basic Editor (VBE) window. | The fastest way to jump directly into the code editor. |
| Click "Visual Basic" | Opens the VBE from the Developer tab. | A reliable, menu-driven way to access the editor. |
| Use the Project Explorer | Navigates the file tree to find your specific macro. | When you have multiple workbooks or modules and need to find the right one. |
Following these steps will get you right to the code every time, letting you focus on the edits you need to make.
It's amazing to think that macros have been a cornerstone of business intelligence since the 1990s. When VBA was introduced in 1993, it was a game-changer, allowing finance teams in over 70% of Fortune 500 companies to automate tasks that used to eat up 15-25 hours every week. Knowing you're working with a tool that has such a long history of saving time is pretty cool.
Of course, the world of automation has evolved since then. If you're curious about what comes after traditional macros, you can explore the new era of automation in Excel.
3 Ways to Find and Make Sense of Your Macro's Code

So, you’ve inherited a spreadsheet packed with macros, or maybe you're trying to debug one you wrote months ago. Finding the right piece of code can feel like digging through a haystack, especially in a file built by someone else. Don't worry. With a few simple tricks, you can quickly track down any macro.
The most direct approach is the Macros dialog box. Just hit Alt+F8. This shortcut pulls up a neat list of all the macros available in your open workbooks. From there, just find the one you need in the list, click on it, and hit the "Edit" button. Excel will whisk you away to the Visual Basic Editor (VBE) and drop your cursor right at the beginning of that macro's code. Simple.
1. Use the Project Explorer to See the Big Picture
Once you’re in the VBE, a more organized way to see everything is with the Project Explorer. It's that tree-like panel on the left side of the editor, and it's basically a map of every single place code can hide in your workbook.
Most of the time, your code will be in one of three spots:
- Modules: This is the most common place. If you used the Macro Recorder or wrote a general-purpose script, it's almost certainly here. When in doubt, start your search in the Modules folder.
- Worksheet Objects: Sometimes, code is tied to a specific worksheet. These macros often react to events, like a value changing in a certain cell. In the Project Explorer, you'll find these under "Microsoft Excel Objects," listed with their sheet names, like
Sheet1 (SalesData). - ThisWorkbook: This special object is for code that applies to the entire workbook, such as a macro that needs to run automatically every time you open the file.
Getting familiar with this structure is a game-changer. It helps you understand not just what the code does, but also where and why it runs.
2. Trace a Macro Back from a Button
But what if the macro is attached to a button on the spreadsheet? This is a classic setup—think of a big "Refresh Report" button on a dashboard. Finding its code is incredibly easy.
All you have to do is right-click the button or shape and select "Assign Macro" from the menu that pops up. A new window will appear, showing you the exact name of the macro that button is linked to. Now that you have the name, you can use the Alt+F8 trick to jump straight to the code.
Honestly, this is my go-to method for any workbook I didn't build myself. I start from the user's point of view—the button they click—and work my way back to the code. It’s a much faster way to find what I'm looking for than trying to decipher file structures from scratch.
3. Know Where Your Code Lives
As you get comfortable navigating the VBE, you'll notice that code stored in a standard Module behaves differently from code inside a Worksheet object. Module code is for general procedures you might run manually, while worksheet code is usually for event-based automation—like something happening when a user double-clicks a cell.
Understanding this distinction helps you predict how a macro will behave before you even run it. If you want to see some practical examples of these different types of macros, take a look at our collection of macro samples in Excel. Seeing them in action is the best way to cement the concepts and become a more confident and effective VBA editor.
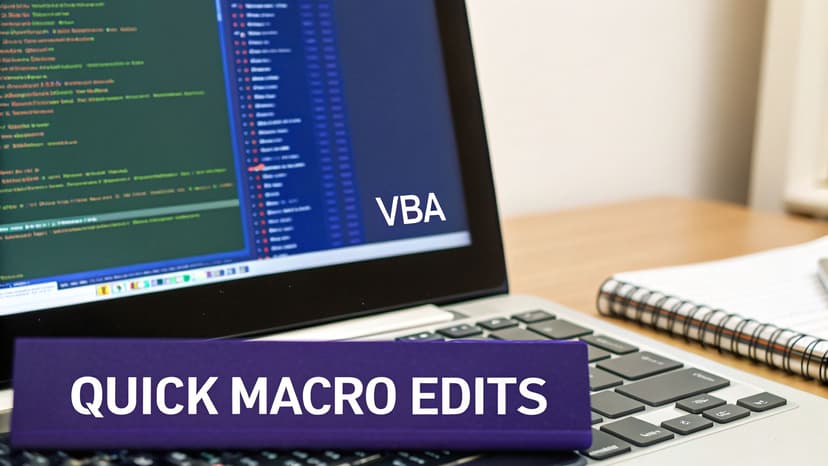
Making Your First 5 High-Impact Macro Edits
Alright, you’ve found the code. Now for the fun part: making it better. Getting comfortable with a few simple but powerful edits is the fastest way to build your confidence and make your macros more reliable.
These are the exact kinds of fixes that developers and analysts make every single day. Let's walk through five of them.
1. Stop Hardcoding File Paths
I can't tell you how many times I've seen a macro break for the simplest reason: it's looking for a file that isn't there. This usually happens when the file path is "hardcoded," meaning it points to a specific folder on the original creator's computer.
Before: This code only works for John Doe. For everyone else, it will crash.Workbooks.Open "C:\Users\JohnDoe\Documents\SalesData\Q1_Report.xlsx"
After: A much smarter way is to have the macro ask the user where the file is. We can do this with a simple InputBox. Now, anyone can run it.
' Ask the user to provide the file path
Dim FilePath As String
FilePath = InputBox("Please enter the full path to the sales report file:")

' Open the workbook specified by the user
Workbooks.Open FilePath
Explanation: Dim FilePath As String declares a variable to hold text. FilePath = InputBox(...) displays a popup asking the user for input, which is then stored in the FilePath variable. Finally, Workbooks.Open FilePath opens the file specified by the user, making the macro dynamic and shareable.
2. Teach Your Macro to Find the Last Row
Another classic point of failure is a fixed data range. If your macro is built to work on 100 rows of data, it will completely ignore row 101 when your report grows. You need to teach your code to be more flexible.
Before: The formula is only applied to the first 10 rows.Range("B2:B10").Formula = "=A2*0.05"
This is a ticking time bomb. As soon as your data exceeds ten rows, your report will be incomplete.
After: With a couple of extra lines, we can make the macro find the last row of data on its own. It's a small change that makes your automation incredibly resilient.
' Find the last row with data in Column A
Dim LastRow As Long
LastRow = Cells(Rows.Count, "A").End(xlUp).Row

' Apply the formula to the entire range dynamically
Range("B2:B" & LastRow).Formula = "=A2*0.05"
Explanation: Dim LastRow As Long creates a variable for a large number. LastRow = Cells(Rows.Count, "A").End(xlUp).Row is a standard VBA trick. It goes to the very last cell in column A (Cells(Rows.Count, "A")), then travels up (.End(xlUp)) until it finds the first cell with data, and gets its row number (.Row). Range("B2:B" & LastRow) then constructs the range dynamically, e.g., "B2:B500" if LastRow is 500.
3. Expand a Loop to Cover New Columns
Your reports and datasets are living things—they change. Imagine your macro neatly formats a report with four columns, but your team just added a fifth one for "Region." Instead of rewriting the macro, you just need to adjust its loop.
Before: The loop is hardcoded to run 4 times, stopping at column D.
For i = 1 To 4
    Columns(i).AutoFit
Next i
After: It’s a one-character fix. By changing the 4 to a 5, you tell the loop to continue one more time to include the new column E.
' Loop from column 1 (A) to 5 (E)
For i = 1 To 5
    ' Autofit each column for better readability
    Columns(i).AutoFit
Next i
Explanation: The For i = 1 To 5 ... Next i structure creates a loop. The code inside the loop (Columns(i).AutoFit) runs repeatedly. In the first run, i is 1, so Columns(1).AutoFit runs on column A. In the second run, i is 2, running on column B, and so on, until it reaches 5 (column E).
4. Quickly Update an Email Recipient List
Automated email reports are a massive time-saver. When a new person joins the team or a manager needs to be added to the distribution list, you don't need a developer. You just need to find the right line of code.
Before: The macro sends the email to a single hardcoded address..To = "[email protected]"
After: Just add the new email address, separated by a semicolon. It's that easy.' Add the new analyst to the recipient list.To = "[email protected]; [email protected]"
5. Leave Yourself (and Others) Helpful Comments
This might be the most important edit you can make, especially when you're just starting out. Comments are notes for humans that the code completely ignores. They start with a single quote (') and are your best tool for explaining why the code is doing what it's doing.
The best edits aren't just about changing what the code does, but also about making it understandable for the next person who opens it. That next person is often your future self.
Before: This code works, but what does it do? It's not immediately obvious.
If IsError(c.Value) Then
    c.Value = 0
End If
After: With a couple of simple comments, the purpose of the code is crystal clear to anyone who reads it.
' Check if the cell contains an error (like #N/A)
If IsError(c.Value) Then
    ' If it's an error, replace it with 0
    c.Value = 0
End If
As you get more comfortable, you'll discover that the automation possibilities in Excel are nearly endless. Writing clean, well-commented code is the secret to managing that power effectively.
Solving 9 Common Macro Errors with Debugging Tools
Sooner or later, every macro you edit will break. It’s not a failure; it’s a clue. Getting frustrated by those cryptic error messages is easy, but learning to debug is what separates the novices from the pros. Think of it as detective work. Instead of guessing, you can use Excel's own built-in tools to hunt down the problem with precision.
Some errors are just more common than others. After a while, you start to recognize them like old, annoying friends. Spotting the problem is half the battle.
Recognizing 4 Frequent VBA Errors
After years of wrestling with VBA, I’ve found that a few usual suspects are responsible for most headaches. Here’s what to look for when your macro grinds to a halt:
- Run-time error '1004': This one's a classic. It usually means your code is trying to grab something that isn't there—like referencing a cell on a worksheet you misspelled or that doesn't exist.
- Run-time error '9': Subscript out of range: You’ll hit this if you ask for an item in a collection that’s out of bounds. A perfect example is trying to activate
Worksheets("Sheet5")when your workbook only has three sheets. - Run-time error '13': Type mismatch: This happens when you try to fit a square peg in a round hole, like stuffing text into a variable that was explicitly set up to hold a number.
- #NAME? Error: This error shows up right in your spreadsheet cells. It’s Excel's way of telling you it doesn't recognize a function name you typed. Double-check for typos in both your VBA code and the formula bar.
Debugging isn't about guessing; it's a methodical hunt. By using the right tools, you can watch your code execute line by line, see exactly where it breaks, and inspect the values of your variables at that exact moment.
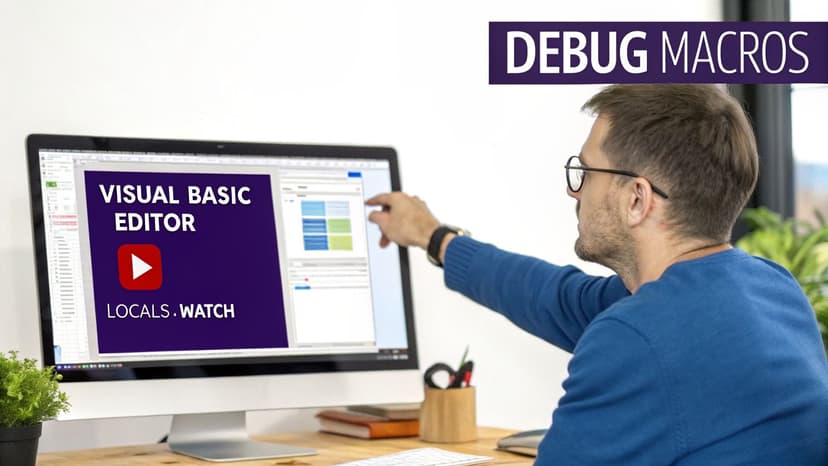
Mastering the VBE's 3-Part Debugging Toolkit
The Visual Basic Editor (VBE) is more than just a place to write code; it’s a full-on diagnostic lab. When that error box pops up, resist the urge to click "End." Your best move is to hit "Debug," which zaps you directly to the line of code that caused the crash.
Once you're there, these are your most powerful allies:
- Step Into (F8): This is your magnifying glass. Tapping F8 makes your code run one single line at a time. It’s the best way to walk through your logic and see the exact moment things go sideways.
- Breakpoints (F9): If you have a massive macro, stepping through it line-by-line is a nightmare. Instead, set a breakpoint by clicking in the gray margin next to a line of code. A red dot will appear, and your macro will run at full speed until it hits that spot, then pause for you.
- The Locals Window: This is where the magic happens. While your code is paused, open this panel from
View > Locals Window. It shows you the real-time value of every single variable in your procedure. As you step through with F8, you can watch the values change and instantly spot when something doesn't look right.
Believe it or not, macro bugs have been a thorn in the side of businesses for decades. The move from old-school XLM macros to VBA in the 1990s was a huge leap, but a 2012 Gartner poll still found that 48% of enterprise VBA code was riddled with bugs.
For a deeper look into spreadsheet problems that go beyond just macros, check out our guide on troubleshooting Excel errors. The more patterns you learn to recognize, the faster you'll solve them.
A Modern Alternative: 2 Reasons to Ditch Manual Macro Edits for AI
While knowing how to edit excel macros is a great skill to have in your back pocket, let’s be honest: it’s not always the best use of your time. For many of us, the days of losing hours trying to decipher and fix old, poorly documented VBA code are numbered. Manually debugging legacy macros is tedious, frustrating, and a huge source of errors.
What if you could skip the code altogether? A smarter, AI-powered workflow is making that possible. Imagine you need to add a new pivot chart and a sales forecast to an existing report. Instead of cracking open the VBA editor, you could just describe what you need in plain English.
1. How AI Agents Work in Excel
This is where tools like ElyxAI are changing the game. Think of ElyxAI as an AI agent that lives right inside your Excel workbook. It can understand and execute complex, multi-step tasks from a single text command, completely bypassing the need to write, edit, or debug a single line of VBA.
For instance, you could give it a prompt like this:
"Clean up the sales data in columns A through G, create a quarterly forecast for next year using the FORECAST.ETS function, and then generate a PowerPoint summary with the key charts."
An AI agent gets to work and handles the entire process on its own. This shift to conversational instructions doesn't just save you hours of technical work; it also dodges the security risks that come with running old, unverified macros you might have inherited.
For example, to get a sales forecast, you could use an Excel formula like FORECAST.ETS.=FORECAST.ETS(A15, B2:B14, A2:A14, 1, 1)
Formula Explanation:
A15: The target date for which you want to predict a value.B2:B14: The range of historical sales values (youry-values).A2:A14: The range of historical dates (yourx-values).1(first 1): A parameter for seasonality.1tells Excel to detect it automatically.1(second 1): A parameter for data completion.1tells Excel to fill missing points by averaging neighbors.
While you could write a macro to apply this formula, an AI agent can generate and apply it based on a simple sentence, saving you the trouble.
2. From Manual Macros to Autonomous AI
Excel automation has certainly come a long way. When Microsoft Excel first launched for the Macintosh on September 30, 1985, it already had built-in macro support from version 1.0. The jump from that early XLM language to the power of VBA was a massive leap, but AI is proving to be the next major evolution. You can read more about Excel's 30-year journey of excellence to see just how far we've come.
The real benefit here is a mental shift. Instead of getting stuck on how to do something in Excel, you can focus on what you want to accomplish. You provide the goal, and the AI handles the execution.
This approach is perfect for anyone who needs to get results fast without getting tangled in the weeds of programming logic. If you're curious how this new generation of tools stacks up against traditional scripting, you can learn more about AI as a powerful VBA alternative. With AI, you can automate complex tasks without ever having to open the Visual Basic Editor again.
3 Common Questions (and Answers) When Editing Excel Macros
Once you start tinkering with Excel macros, you're bound to hit a few common roadblocks. It happens to everyone. Getting ahead of these little "gotchas" can save you a world of frustration, turning a potential headache into a quick fix. Let's walk through some of the questions I hear most often from people who are new to editing VBA code.
1. Is There an "Undo" Button for Macro Edits?
This is the big one that trips up nearly everyone at first. The short, and slightly painful, answer is no. The standard Ctrl+Z command you know and love in Excel is completely non-functional inside the Visual Basic Editor (VBE). Once you change a line of code, it's changed for good.
Because there's no safety net, you have to create your own.
Before you dive into any major changes, get into the habit of backing up your work. It's easy: just right-click the module in the Project Explorer, select 'Export File,' and save it as a .bas file. If your edit breaks everything, you can delete the broken module, re-import your backup, and you're right back where you started.
2. Help! My Edited Macro Is Suddenly Super Slow. What Are 2 Fixes?
If your macro starts chugging along after an edit, it's almost certainly a sign of inefficient code rather than a problem with the edit itself. I've seen this happen countless times, and it usually boils down to two main culprits: selecting cells unnecessarily and forcing Excel to redraw the screen constantly.
Think about it: your code doesn't need to physically select a cell to work with it. An instruction like Range("A1").Select is slow. A much cleaner and faster approach is to act on the cell directly: Worksheets("Data").Range("A1").Value = 10. This small tweak avoids a whole unnecessary action.
For the single biggest performance boost, you can temporarily tell Excel to stop updating the screen. It's a game-changer. Just add this line at the beginning of your macro:
Application.ScreenUpdating = False
This prevents the screen from flickering and redrawing with every single step in your code. Just don't forget to turn it back on at the very end with Application.ScreenUpdating = True. A macro that once took a minute can often finish in seconds with this one trick.
3. How Can I Share My Macro with My Team?
VBA code lives inside the Excel workbook, not in a separate file on your computer. So, to share your creation, you need to save the workbook in a special format.
When you go to "Save As," you have to change the file type from the default. Choose "Excel Macro-Enabled Workbook" from the dropdown menu. This saves the file with a .xlsm extension.
This is critical: If you save it as a standard .xlsx file, Excel will strip out all of your VBA code, and it won't even warn you before it does. When your colleague opens the .xlsm file, they'll see a yellow security bar. They just need to click "Enable Content" for the macro to be active on their machine.
Tired of digging through old VBA code to make a simple change? ElyxAI acts as your autonomous Excel agent, handling complex tasks from a single text command. Stop debugging and start analyzing. Discover how much time you can save by visiting us at https://getelyxai.com.
Reading Excel tutorials to save time?
What if an AI did the work for you?
Describe what you need, Elyx executes it in Excel.
Sign up